

ARM Cortex-M NVIC Interrupt Latency Optimization Techniques
September 22, 2026
9 min
Slow boot times in Embedded Linux systems are a common frustration for engineers, delaying product development and impacting time-to-market. Whether you’re working on a consumer IoT device, an industrial controller, or automotive electronics, users expect instant responsiveness. A slow boot not only creates a poor first impression but can also affect power consumption in battery-operated devices, as the system spends more time in a high-energy state during initialization.
This article addresses the real-world problem of slow boot times by providing a systematic approach to diagnose, analyze, and optimize the boot process. We’ll cover measurement techniques, identify common bottlenecks across the boot stack, and present practical solutions ranging from kernel configuration to distribution customization. Each solution includes trade-offs, implementation steps, and verification methods to help you achieve faster boot times without compromising functionality.
Before optimizing, you must measure. The first step in any performance improvement effort is establishing a baseline. For Embedded Linux systems using systemd (the default in most modern distributions), the systemd-analyze tool provides detailed insights into boot performance.
Run the following command on your target device to see a breakdown of boot time:
systemd-analyze
This outputs something like:
Startup finished in 2.5s (kernel) + 4.8s (userspace) = 7.3sgraphical.target reached after 4.8s in userspace
To see which services are taking the longest, use:
systemd-analyze blame
Sample output:
2.1s plymouth-quit-wait.service1.8s dev-mmcblk0p2.device1.5s networking.service1.2s wpa_supplicant.service900ms systemd-modules-load.service800ms systemd-udevd.service600ms accounts-daemon.service
This blame output helps you identify specific services that are delaying boot. Additionally, systemd-analyze plot generates an SVG visualizing the boot process, highlighting parallelism and sequential dependencies.
For systems without systemd (e.g., using SysVinit or BusyBox), you can measure boot time by checking the kernel timestamp in dmesg or using a GPIO toggle with an oscilloscope. However, systemd-analyze remains the most convenient and detailed method for most Embedded Linux setups.
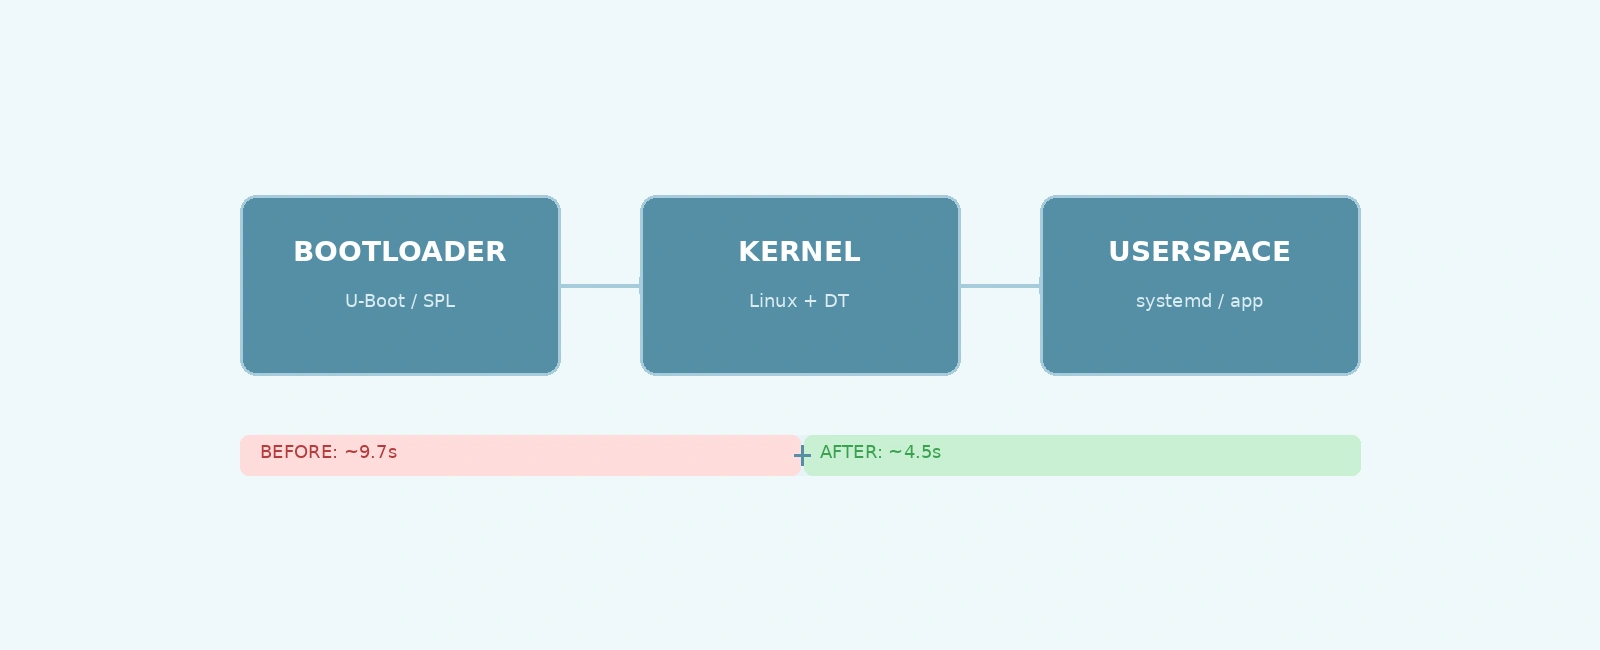
Here’s a simplified representation of the typical Embedded Linux boot sequence:
+----------+ +-----------+ +--------+ +------+ +-----------+ +-------+| Power On |--->| Bootloader|--->| Kernel |--->| Init |--->| Userspace |--->| Ready || (ROM) | | (U-Boot) | | (Linux)| | (PID1)| | (services)| | |+----------+ +-----------+ +--------+ +------+ +-----------+ +-------+~0s 0.5-2s 1-3s 0.1s 1-5s
Each stage contributes to the total boot time, and optimizations can be applied at each level.
Understanding the root causes allows you to target optimizations effectively. The boot process consists of several stages, each contributing to the total time:
The kernel boot time includes decompression, hardware detection, driver initialization, and mounting the root filesystem. Common culprits:
CONFIG_DEBUG_KERNEL, dynamic_debug) increase boot time and log volume.The device tree describes hardware to the kernel. A bloated or inefficient device tree increases kernel boot time:
The init system (systemd, SysVinit, or BusyBox) starts user-space services. Issues include:
Individual services may have slow startups due to:
The root filesystem location significantly impacts boot time:
The Linux kernel is highly configurable. By building a kernel tailored to your hardware, you can eliminate unnecessary initialization steps.
Start with a baseline configuration: Use your board’s defconfig as a starting point.
make <board_defconfig>
Enable modularization: Build drivers as modules (m) whenever possible, so they load only when needed.
Device Drivers → Generic Driver Options → [*] Support for uevent helper to cold-plug modules (optional)M (module) instead of Y (built-in).Disable unused subsystems: Go through each menu and disable what you don’t need.
Device Drivers → USB support.Networking support → Wireless.Optimize kernel features:
General Setup, consider disabling:[*] Kernel .config support (if you don’t need /proc/config)[*] Enable access to .config through /proc/config (CONFIG_IKCONFIG)[*] Enable PCI support (if your board has no PCI)Processor type and features, disable:[*] Symmetric multi-processing support (if single-core)[*] SMT (Hyperthreading) scheduler support (if not needed)Compile and install: Build the kernel, install it on your target, and reboot.
make -j$(nproc)make modules_installcp arch/arm/boot/zImage /boot/cp arch/arm/boot/dts/<your-dtb>.dtb /boot/
Here’s a snippet showing disabled unused features:
# General setup# CONFIG_IKCONFIG is not set# CONFIG_IKCONFIG_PROC is not set# Processor type and features# CONFIG_SMP is not set# Bus options (PCI etc.)# CONFIG_PCI is not set# Device Drivers# CONFIG_USB_SUPPORT is not set# CONFIG_SERIAL_8250 is not set# CONFIG_INPUT_EVDEV is not set
The device tree is a data structure describing hardware. Optimizing it reduces kernel boot time by minimizing the data the kernel must parse.
Remove unused nodes: If your board variant doesn’t use a peripheral, delete its node or comment it out.
&can1 node or disable it via status = “disabled”.Use device tree overlays for flexibility: Instead of creating multiple device tree files for minor variations, use .dtbo overlays to enable/disable features at runtime.
fdt apply or kernel configfs), compose the final device tree from a base .dtb and board-specific overlays.Simplify property values: Avoid long strings or unnecessary properties.
label, use a simple identifier if possible.Combine similar nodes: If multiple instances of a peripheral have identical configurations, use a single node with reg array and status properties to enable/disable instances.
Before (inefficient):
&can0 {status = "okay";/* ... 20 lines of configuration ... */};&can1 {status = "disabled"; /* Not used on this variant *//* ... 20 lines of identical configuration ... */};&can2 {status = "disabled"; /* Not used *//* ... 20 lines of identical configuration ... */};
After (optimized):
/* Only enable what we use */&can0 {status = "okay";/* ... configuration ... */};/* Disable unused controllers to prevent driver probing */&can1 {status = "disabled";};&can2 {status = "disabled";};
Even better, if you never use CAN1 and CAN2 on any variant, remove their nodes entirely from the base .dtsi and only enable CAN0 in your board file.
systemd-analyze), cleaner device tree source.Most modern Embedded Linux distributions use systemd. Optimizing service startup can yield substantial userspace boot time improvements.
systemd-analyze blame and look for services with high times that aren’t critical for early boot.systemd-analyze critical-chain to see the boot chain and dependencies.systemd-analyze critical-chain
systemctl mask bluetooth.service # Example: disable Bluetooth if not usedsystemctl mask avahi-daemon.service
After= and Before= dependencies that might be overly restrictive.systemd-analyze plot to visualize concurrency.Suppose wpa_supplicant.service takes 1.5 seconds to start because it waits for the network interface to be ready. You can:
After= dependencies.Wants= in a target that starts later).The storage subsystem affects both kernel initialization (rootfs mount) and userspace service startup (reading binaries, libraries, and data).
data=writeback journaling (less safe but faster) or disable journaling entirely if you have a power-loss tolerance mechanism./dev/mmcblk0p2 / ext4 defaults,noatime,nodiratime,data=writeback 0 1
fsck frequency or disable it for fast boot (with caution).tune2fs -i 0 -c 0 /dev/mmcblk0p2 # Disable interval and count-based checks
mkinitfs (Buildroot) or dracut with a minimal module list.Yocto Project allows you to create a custom Linux distribution tailored exactly to your needs, eliminating unnecessary packages and services.
core-image-minimal as your base image.conf/local.conf to set:IMAGE_INSTALL:append = " packagegroup-core-boot"IMAGE_FSTYPES:append = " ext4"
IMAGE_INSTALL:remove to exclude packages you don’t need.IMAGE_INSTALL:remove = "bluez5 bluez5-utils wpa-supplicant gtk+3"
systemd and enable sshd and your application service.IMAGE_INSTALL:append = " openssh-sshd"SYSTEMD_AUTO_ENABLE:${PN} = "enable"
bitbake core-image-minimal
packagegroup-core-boot: This group includes only the bare essentials for booting..config file in your Yocto layer and assign it to linux-yocto.IMAGE_FSTYPES:append = " squashfs" for a compressed, read-only root filesystem.The bootloader (typically U-Boot in Embedded Linux) runs before the kernel. Optimizing it saves time in the earliest stage.
CONFIG_BOOTDELAY to 0 or 1 second (or use the bootdelay environment variable to interrupt only on keypress).CONFIG_BOOTDELAY=0
setenv bootdelay 0; saveenvCONFIG_USB_STORAGE.After implementing optimizations, verify the improvements to ensure you’ve actually reduced boot time without breaking functionality.
systemd-analyze (or oscilloscope method).systemd-analyze again and compare the numbers.Baseline:
Startup finished in 3.2s (kernel) + 6.5s (userspace) = 9.7s
After kernel optimization:
Startup finished in 2.1s (kernel) + 6.5s (userspace) = 8.6s
(Kernel time reduced by 1.1s)
After disabling unnecessary services:
Startup finished in 2.1s (kernel) + 4.0s (userspace) = 6.1s
(Userspace time reduced by 2.5s)
After storage optimization (faster eMMC):
Startup finished in 1.5s (kernel) + 3.0s (userspace) = 4.5s
(Both kernel and userspace improved due to faster storage access)
Slow boot times in Embedded Linux are rarely due to a single issue; they result from inefficiencies across the entire boot stack. By systematically measuring, analyzing, and optimizing each stage—from bootloader to kernel, device tree, init system, services, and storage—you can achieve dramatic improvements.
The key takeaways are:
systemd-analyze to understand where time is spent.With these strategies, reducing boot time from seconds to under a second is achievable for many Embedded Linux applications, leading to better user experiences, lower power consumption, and faster time-to-market.
For further optimization techniques specific to embedded systems, see these embeddedSoft articles:
Quick Links
Legal Stuff