


Building a Home Lab for Embedded Development
June 23, 2026
4 min
Continuous Integration (CI) is standard practice in web and cloud development, but embedded firmware teams have been slower to adopt it. The reasons are understandable — embedded projects involve cross-compilation toolchains, hardware-in-the-loop testing, and proprietary SDKs that are harder to containerize than a Node.js app. But the payoff is enormous: every commit is built, analyzed, and tested automatically before it reaches the main branch.
This post walks through the core concepts of setting up a CI pipeline for an embedded firmware project, from basic build automation through unit testing to hardware-in-the-loop validation.
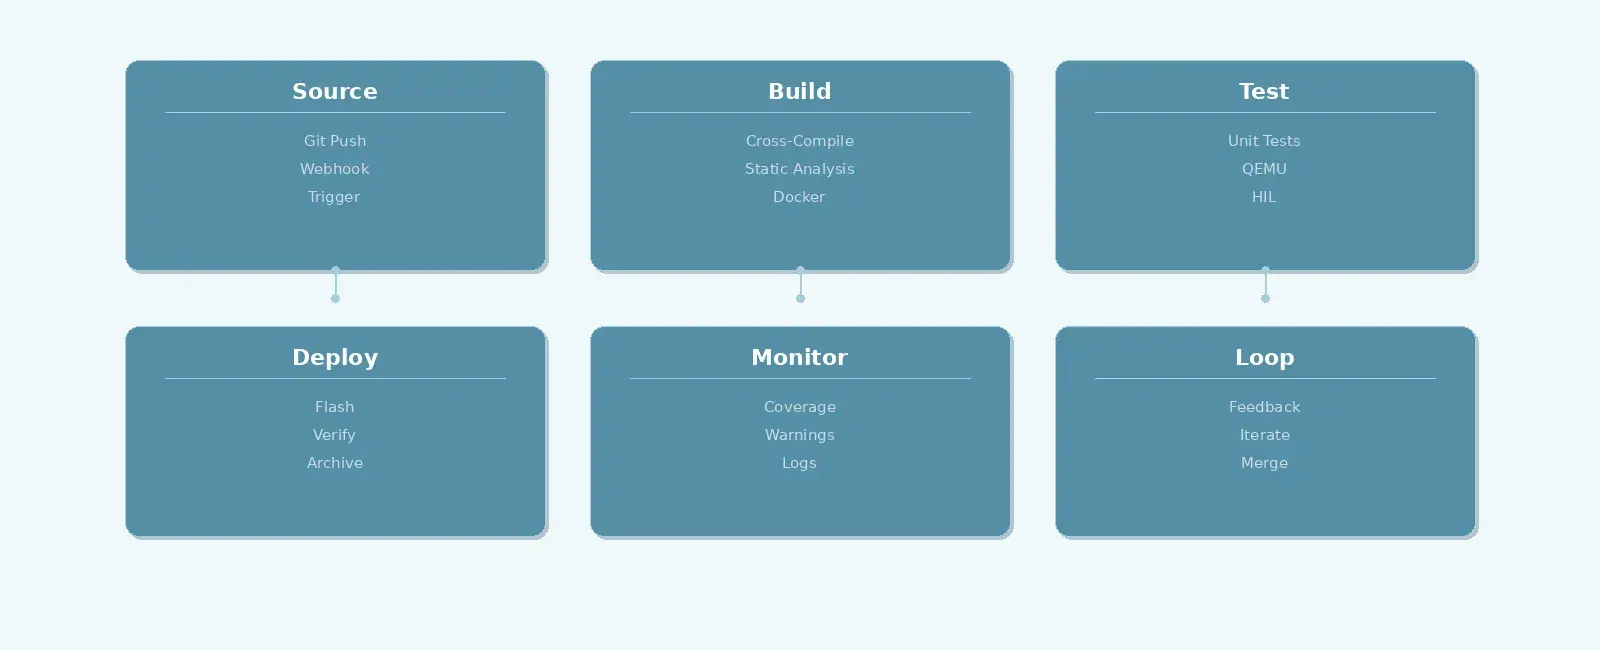
A typical CI pipeline for firmware has four stages: Source, Build, Test, and Deploy. Each stage produces artifacts and passes them to the next.
+----------+ +----------+ +----------+ +----------+| Source | ----> | Build | ----> | Test | ----> | Deploy || Git Push | | Cross- | | Unit + | | Flash + || | | Compile | | HW | | Verify |+----------+ +----------+ +----------+ +----------+|v+------+| Loop |+------+
When a developer pushes code, the CI server automatically triggers the pipeline. If any stage fails — a compilation error, a failing test, a static analysis warning — the team gets notified immediately. No more “it works on my machine” surprises.
The pipeline starts with a Git push to a shared repository. Most embedded teams use either GitHub Actions, GitLab CI/CD, or Jenkins as their CI server. All three support webhook-based triggers: when code is pushed to a branch or a pull request is opened, the CI server spins up a runner.
# Example: .github/workflows/firmware.yml (GitHub Actions)name: Firmware CIon:push:branches: [main, develop]pull_request:branches: [main]jobs:build:runs-on: ubuntu-lateststeps:- uses: actions/checkout@v4- name: Build firmwarerun: make -j$(nproc)
The key insight is that the CI configuration file lives in the repository itself. This means the build process is version-controlled and reproducible — anyone can see exactly how the firmware is built.
Embedded firmware targets microcontrollers, not the x86 machines that CI runners provide. This means you need a cross-compilation toolchain (like arm-none-eabi-gcc) available inside the CI environment.
The best approach is to use a Docker container with the toolchain pre-installed:
# Dockerfile.firmware-ciFROM ubuntu:22.04RUN apt-get update && apt-get install -y \gcc-arm-none-eabi \make \cmake \python3 \cppcheck \lcov
By pinning the toolchain version in the Docker image, you guarantee that every build — whether on a developer’s laptop or the CI server — produces identical binaries. This eliminates an entire class of “my compiler version is different” bugs.
Testing is where embedded CI diverges most from traditional software CI. There are three levels:
Pure logic functions (protocol parsers, state machines, CRC calculators) can be compiled and run on the CI host directly:
// test_crc.c — runs on the CI host, no hardware needed#include <assert.h>#include "crc32.h"void test_crc32_known_value(void) {uint8_t data[] = {0xDE, 0xAD, 0xBE, 0xEF};uint32_t result = crc32(data, 4);assert(result == 0x7C54D4B8);}int main(void) {test_crc32_known_value();return 0;}
These tests run fast, require no hardware, and catch logic errors early. Frameworks like Unity, CMock, and CppUTest are purpose-built for embedded C testing.
Some tests need to be compiled for the target architecture and run in an emulator like QEMU:
# Run target tests in QEMUarm-none-eabi-gcc -mcpu=cortex-m4 -o test.elf test_main.cqemu-system-arm -machine lm3s6965evb -nographic -kernel test.elf
This catches issues like endianness bugs, alignment problems, and instruction set incompatibilities that host-side tests miss.
For the highest confidence, deploy the actual firmware to real hardware connected to the CI server (via USB-connected debug probes). The CI system flashes the firmware, runs integration tests, and verifies real-world behavior:
+----------------+ +-----------------+| CI Server | | Target Board || | USB | || Flash + Test | ----> | MCU + Sensors || | | Reports PASS/ |+----------------+ | FAIL via UART |^ +-----------------+|+--- Test Results ---+
HIL testing is slower and requires physical hardware, but it’s the only way to validate timing-sensitive code, peripheral drivers, and analog signal processing.
Beyond building and testing, CI pipelines should run static analysis tools that catch bugs the compiler misses:
| Tool | What It Catches |
|---|---|
| Cppcheck | Null pointer dereferences, buffer overflows, unused variables |
| Clang-Tidy | Modern C best practices, potential UB, style issues |
| PC-lint | MISRA-C compliance, deep data flow analysis |
| lcov/gcov | Code coverage — which lines were NOT exercised by tests |
# Run cppcheck in CIcppcheck --enable=all --inconclusive --std=c11 src/ 2> cppcheck-report.txt# Generate coverage reportlcov --capture --directory . --output-file coverage.infolcov --remove coverage.info '/usr/*' --output-file coverage-filtered.infogenhtml coverage-filtered.info --output-directory coverage-report/
Setting a minimum code coverage threshold (e.g., 80%) and failing the CI if it’s not met ensures that new code is actually tested.
Here’s what a complete CI pipeline looks like end-to-end:
Developer CI Server Docker Target| | | ||-- git push ------>| | || |-- spin up ------>| || | container | || | |-- cppcheck -->|| | |-- make ------>|| | |-- unit tests || | |-- QEMU tests || |<- results -------| || | || |-- flash firmware via JTAG ------->|| |<- HIL test results via UART ------|| | ||<- pass/fail ------| |
Every push goes through this gauntlet. If all stages pass, the code is safe to merge. If anything fails, the developer gets detailed logs showing exactly what went wrong.
Flaky hardware tests. Hardware-in-the-loop tests can fail intermittently due to timing, loose connections, or probe firmware quirks. Mitigate this by adding retries and ensuring the test harness resets the board between test runs.
Long build times. If a full clean build takes 20 minutes, developers will push less frequently. Use incremental builds and cache build artifacts between runs.
Ignoring warnings. If your build produces 200 warnings, nobody will notice the 201st. Enable -Werror in CI (if not in development) and fail the build on any new warning. A zero-warnings policy keeps the signal strong.
No artifact management. The firmware binary produced by CI should be archived and version-tagged. This makes it trivial to know exactly which binary corresponds to which commit — critical for field debugging.
Setting up CI for embedded firmware requires more upfront effort than for pure software projects, but the return on investment is dramatic. Build failures are caught in minutes instead of days. Regression bugs are caught before they reach QA. Static analysis catches an entire category of bugs that code review alone misses.
Start simple: a pipeline that builds your firmware and runs host-side unit tests. Then layer on static analysis, coverage tracking, and eventually hardware-in-the-loop testing. Each layer adds confidence that your firmware does what it’s supposed to do.
If you’re building out your embedded development workflow, you may also find these posts helpful:
Quick Links
Legal Stuff