


Version Control Best Practices for Embedded Firmware Teams
June 25, 2026
6 min
Unit testing embedded firmware sounds contradictory. How do you test code that talks directly to hardware registers, runs without an operating system, and toggles pins on a physical board? Most teams answer that question with “we test on the hardware” — and then spend hours chasing bugs that a 100-millisecond test would have caught.
The truth is that a large portion of embedded firmware logic is pure software. State machines, protocol parsers, filtering algorithms, configuration managers — none of these need a live MCU to verify. By extracting them into testable modules and running tests on your development PC, you get a fast feedback loop that catches regressions before they reach the bench.
Consider a typical embedded build-and-test cycle: edit code, cross-compile, flash via JTAG/SWD, observe behavior via UART or an oscilloscope. Each iteration takes 30 seconds to several minutes. Now multiply that by the dozens of edge cases you need to verify for each feature. The math doesn’t work.
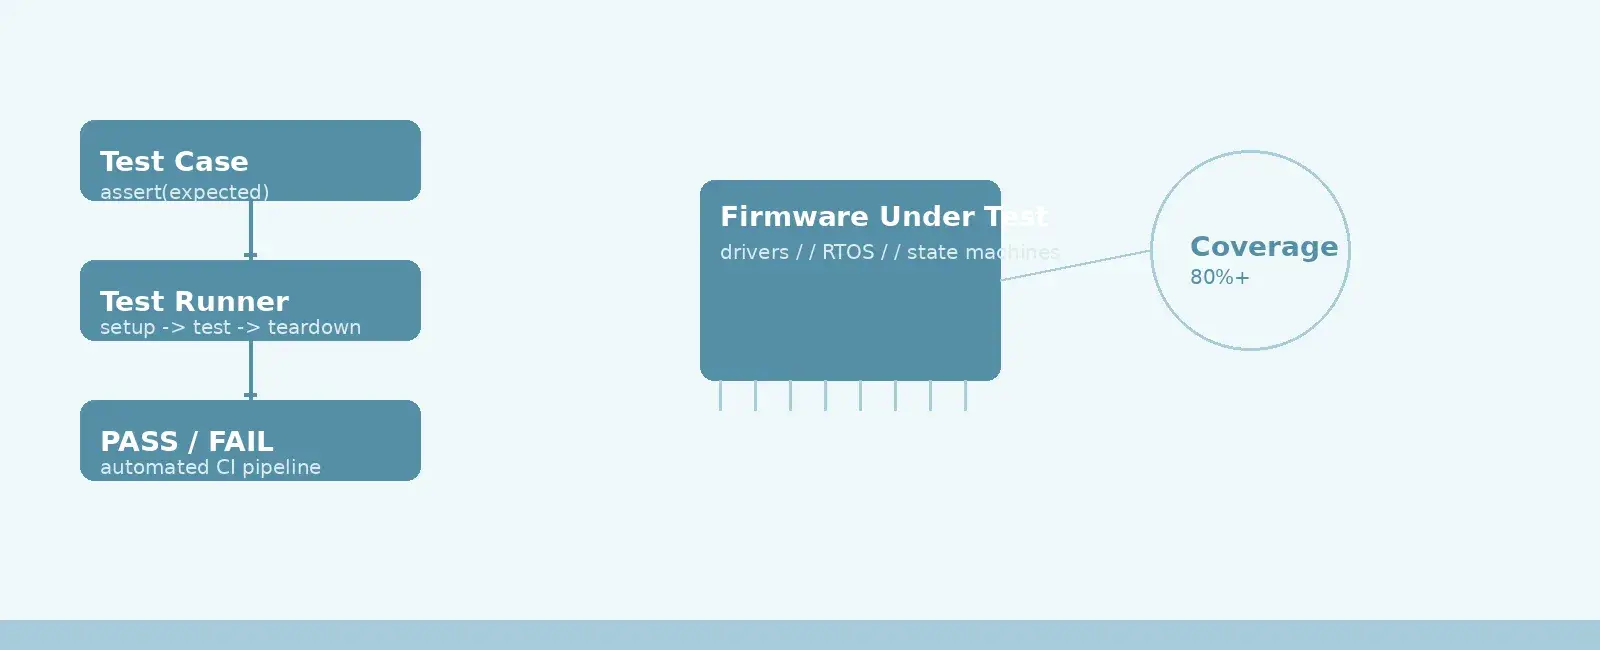
Unit tests flip this equation. A test suite runs hundreds of assertions in under a second. You get immediate feedback — green or red — without touching hardware. This speed enables a workflow where you write a test, write the implementation, see it pass, and move on. Test-driven development (TDD) isn’t just for web applications.
The key insight is that your firmware has two layers: logic (what happens to the data) and hardware access (how you read/write the registers). Unit tests target the logic layer through host-based testing — compiling and running tests natively on your development PC. The hardware access layer gets tested separately through integration tests or Hardware-in-the-Loop (HIL) setups. (Note: in the formal V-model, Software-in-the-Loop (SIL) refers to running compiled production code inside a closed-loop simulation environment, which is a distinct activity from host-based unit testing.)
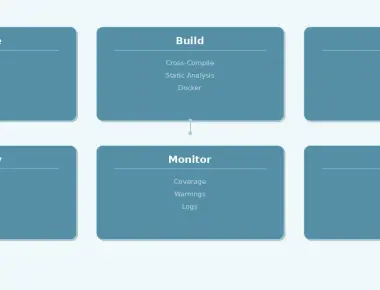
+-----------------------------+ +-----------------------------+| Application Logic | | Hardware Abstraction ||- State machines | |- SPI driver (mock) ||- Protocol parsers | |- I2C driver (mock) ||- Filter algorithms | |- ADC register (mock) |+-----------------------------+ +-----------------------------+| |v v+-------------------------------------------------------------------+| Host-Based Test Suite (PC Native) ||- test_statemachine_transitions() ||- test_protocol_encode_decode() ||- test_filter_edge_cases() |+-------------------------------------------------------------------+|v+-------------------------------------------------------------------+| CI Pipeline ||gcc/clang -> test_runner -> PASS/FAIL -> Block or Merge |+-------------------------------------------------------------------+
The single most important factor in testable firmware is decoupling logic from hardware. If your sensor-processing function directly reads ADC1->DR, you can’t test it without an ADC peripheral. But if it takes a raw ADC value as a parameter and returns a filtered result, you can test it with any input.
Here’s a concrete example. This is hard to test:
// Bad: tightly coupled to hardwarefloat read_temperature(void) {uint16_t raw = ADC1->DR;float voltage = (float)raw * (3.3f / 4095.0f);return (voltage - 0.5f) * 100.0f;}
And this is easy:
// Good: logic separated from hardware access (Pure function)float adc_to_temperature(uint16_t raw_adc) {float voltage = (float)raw_adc * (3.3f / 4095.0f);return (voltage - 0.5f) * 100.0f;}
The second version can be tested with any raw ADC value — no hardware needed. The function is pure: same input always produces same output, with no side effects.
For modules that must interact with hardware, general embedded projects often use function pointers for abstraction. While MISRA C:2012 does not prohibit function pointers outright, safety-critical certification processes (particularly DO-178C) require complete call-graph analysis. Function pointers make static analysis significantly harder because the tool cannot determine the call target at compile time, complicating the verification evidence required for certification.
Instead, critical firmware relies on Link-Time Substitution (Object Seams).
// spi_driver.h#ifndef SPI_DRIVER_H#define SPI_DRIVER_H#include <stdint.h>void spi_cs_low(void);void spi_cs_high(void);uint8_t spi_transfer(uint8_t tx);#endif // SPI_DRIVER_H
// sensor.c (Production Code under test)#include "spi_driver.h"uint16_t sensor_read_register(uint8_t reg) {uint8_t rx_buf[2];spi_cs_low();rx_buf[0] = spi_transfer((uint8_t)(reg | 0x80U));rx_buf[1] = spi_transfer(0x00U);spi_cs_high();return (uint16_t)(((uint16_t)rx_buf[0] << 8U) | (uint16_t)rx_buf[1]);}
In production, you link sensor.o against spi_driver_hardware.o (which accesses real MCU registers). In your host-based test build, you link sensor.o against spi_driver_mock.o (which returns predefined responses). The source code under test is never modified, and no runtime overhead is introduced.
While enterprise environments often mandate certified tools like VectorCAST, LDRA, or Parasoft C/C++test, open-source frameworks like Unity (from ThrowTheSwitch) demonstrate the core concepts beautifully.
A typical test file using Unity looks like this:
#include "unity.h"#include "temperature.h"void setUp(void) {// Runs before each test}void tearDown(void) {// Runs after each test}void test_adc_to_temperature_at_midpoint(void) {// 2048 raw ≈ 1.65V → (1.65 - 0.5) * 100 ≈ 115.03 Cfloat result = adc_to_temperature(2048U);TEST_ASSERT_FLOAT_WITHIN(0.1f, 115.0f, result);}void test_adc_to_temperature_at_min(void) {// 0 raw = 0.0V → (0.0 - 0.5) * 100 = -50.0 Cfloat result = adc_to_temperature(0U);TEST_ASSERT_FLOAT_WITHIN(0.01f, -50.0f, result);}int main(void) {UNITY_BEGIN();RUN_TEST(test_adc_to_temperature_at_midpoint);RUN_TEST(test_adc_to_temperature_at_min);return UNITY_END();}
For projects that need mocking, tools like CMock auto-generate mock implementations from header files. Ceedling ties everything together: it discovers test files, generates mocks, compiles with your native compiler, runs all tests, and reports results. The entire pipeline runs on your development machine — no cross-compilation needed for the logic tests.
Not everything deserves a unit test. Here’s a practical breakdown aligning with the V-Model:
| What to Unit Test (Host-Based) | What to Test Differently (HIL / On-Target) |
|---|---|
| State machine transitions | ISR timing and latency |
| Protocol encoding/decoding | ADC/DAC accuracy on real hardware |
| Filtering and math functions | SPI/I2C bus timing |
| Configuration parsing | Flash write endurance |
| CRC and checksum algorithms | Radio TX power levels |
| Business logic & safety monitors | Actual sensor reading physical accuracy |
The rule of thumb: if the code manipulates data (not registers), it belongs in a host-based unit test. If the code manipulates electrons, it needs hardware (HIL).
The real power of unit testing emerges when you wire it into your continuous integration pipeline. Every push to the repository triggers a build-and-test cycle:
Developer pushes code|CI pipeline starts|Compile test suite (native)|Run all unit tests (host-based)|Report: PASS / FAIL|(Optional) cross-compile for target|(Optional) flash and run integration tests (HIL)
A failing test blocks the merge. No human needs to remember to run the tests — the pipeline enforces it automatically.
Code coverage tells you what percentage of your code the tests actually execute. For general embedded projects, tools like gcov with GCC provide basic metrics:
# Compile with coverage flagsgcc -fprofile-arcs -ftest-coverage -o test_runner test_*.c src/*.c# Run tests./test_runner# Generate reportgcovr --html-details -o coverage_report/index.html
Crucial Warning: In safety-critical systems, coverage is not merely a “nice-to-have” metric. Both DO-178C (Aerospace) and ISO 26262 (Automotive) mandate rigorous structural coverage, but the specific level depends on the criticality:
DO-178C (per Table A-7):
ISO 26262 (Part 6, Table 9):
If your code has unreachable paths or defensive checks that cannot be triggered via normal unit testing, you must justify them formally through a deactivated-code or dead-code analysis, or redesign the code. In these industries, achieving the required coverage level for your criticality rating is a mandatory certification objective, not an optional target.
Testing the implementation, not the requirements. In critical systems, tests must be Requirements-Based. Your tests should trace directly back to Software Requirements Specifications (SRS). If you refactor the internal algorithm without altering the requirements, your tests shouldn’t break.
Ignoring floating-point precision. Use TEST_ASSERT_FLOAT_WITHIN with a tolerance appropriate for your application. Exact equality on floats is almost always wrong and can mask severe numeric instability issues.
Not testing boundary conditions. Zero-length buffers, maximum values, null pointers, empty queues — these are where bugs live. Every if statement has two branches; make sure you exercise both.
Skipping error-handling paths. It’s tempting to only test the happy path. But error handling is where the subtle bugs hide — the buffer overflow that only triggers when the interrupt fires during a specific state transition.
Unit testing embedded firmware is not about replacing hardware testing — it’s about catching logic errors fast, automatically, and repeatedly. By decoupling your logic from hardware access through clean interfaces and object seams, you can test the majority of your firmware code on a development machine in milliseconds. Combine this with CI pipelines that run on every commit, and you build a safety net that catches regressions before they reach the bench.
For developers entering the automotive or aerospace sectors, embracing host-based testing, requirements traceability, and the structural coverage objectives mandated by your target criticality level (MC/DC for DO-178C Level A, Decision Coverage for Level B, etc.) is non-negotiable. Start small, write robust tests, and build absolute confidence in your logic before it ever touches silicon.
Quick Links
Legal Stuff